3D Printed Molds vs Mold Masters: Which Should You Print for Casting?
Print a master and pour a silicone mold, or print the mold itself? How undercuts, surface, cure inhibition, release, venting and heat decide.
The Short Answer
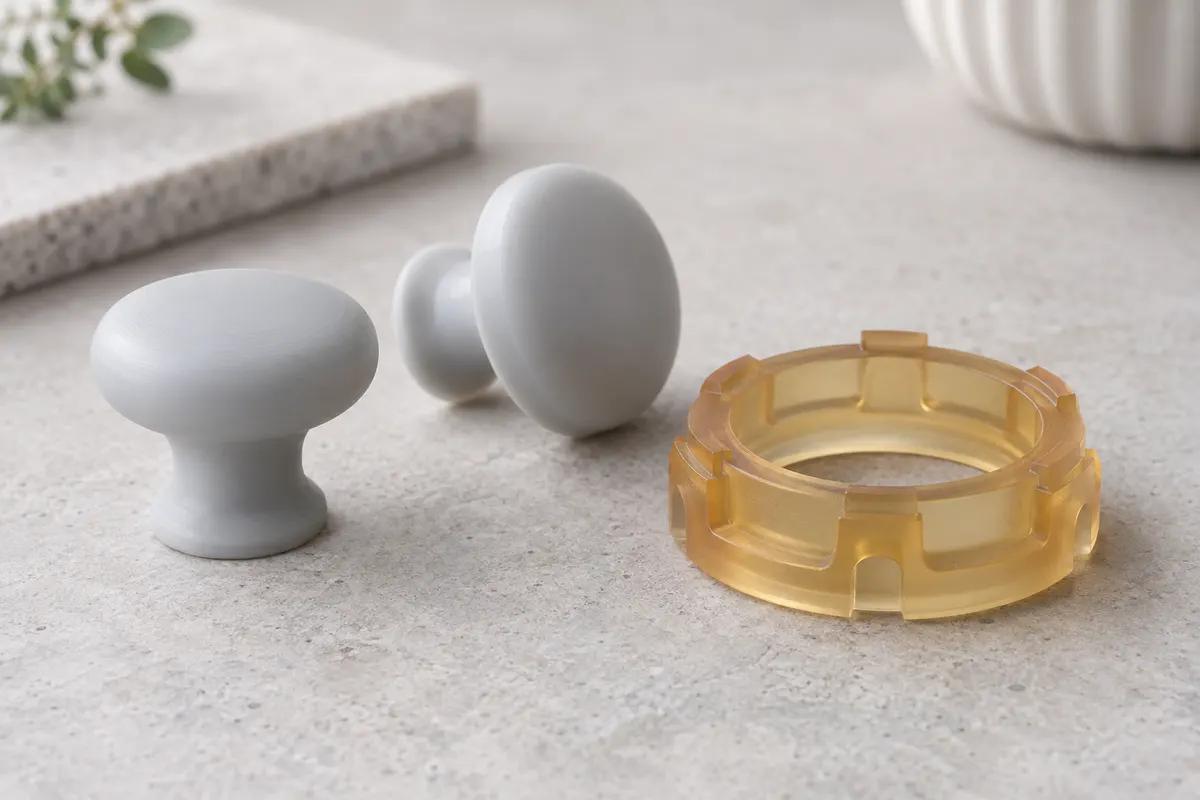
A printed master is a positive copy of the part: you pour flexible silicone around it, and the silicone mold does the casting. A printed mold is the negative itself, so you cast straight into the print, which skips the silicone step but makes the print the tool: its surface, draft, heat resistance and chemistry touch every casting. Print a master when the part has undercuts or delicate detail, needs a fine cosmetic surface, or will be cast more than a few times. Print the mold when the shape releases from a rigid cavity, or the casting is flexible enough to pull out, and the run is short. Either way, test the casting material against the printed surface before you commit.
Two Routes Compared
| Question | Print a master | Print the mold |
|---|---|---|
| What is printed | A positive of the part | The negative: the cavity |
| What touches the casting | Silicone mold rubber | The printed surface |
| Undercuts | Flexible silicone can release them | Need extra mold pieces or a flexible casting |
| Draft | Helpful, rarely essential | Needed for rigid castings |
| Surface of the casting | Copied from the master via the silicone | Copied directly from the print |
| Steps before casting | Prepare the master, pour the mold | Finish, seal, release and test the print |
What a Master Is, and Why Its Surface Matters
A master, or pattern, is a model of the finished part. Wacker describes its mold-making silicones as highly elastic, with excellent release properties, and as faithfully reproducing the original, so whatever is on the master's surface ends up on every casting. That is why masters are usually printed in SLA: on our SLA parts the support marks on the bottom face are sanded by default, and polishing and painting are add-ons. An FDM master needs its layer lines filled first. Smooth-On describes its XTC-3D coating as filling 3D print striations to a smooth, high-gloss finish, brushed on in layers thinner than 1/64 in (about 0.4 mm), so leave room for the coating on critical dimensions. The small-batch silicone parts guide covers the rest of the master route: preparing an SLA master, hardness, shrinkage, mold life and repeat runs.
Why Flexible Molds Forgive Geometry
A silicone mold bends to let the part out. Smooth-On's guide to durometer gives the example of a delicate model with thin, angled features: a stiff rubber would not flex enough to extract it without breaking it, while a soft one releases it easily. Smooth-On also rates silicone as having the best release properties of the mold rubbers it compares, often needing no release agent for casting, and the longest mold life for casting urethane, polyester or epoxy resins. A rigid printed mold has none of that flexibility. A rigid casting in a rigid mold follows the same rule as a production mold: MIT's injection molding notes call for draft to remove parts, typically 1–2° depending on material, dimension and texture. A rigid shape with undercuts needs more mold pieces, a flexible casting, or a master and a silicone mold instead.
What a Printed Mold Is
A printed mold carries the cavity, the pour spout, the vents and the alignment keys in the print itself, so there is no mold box and no silicone to pour. Makers describe the practice for resin prints: Smooth-On's bulletin for its own printing resin, XTC-3D PRINT, says a print that has been fully post-cured is ready to mold or cast into when the print itself is the mold, with a release agent applied first so the silicone does not bond to it. Because silicone reproduces surface detail faithfully, a silicone casting copies every layer line and support mark in the cavity, so the inside of the mold needs the finish you want on the part. The cavity faces inward, which makes it harder to post-cure, coat and polish than the outside of a master.
Cure Inhibition: Test Before You Pour
Platinum-cure (addition-cure) silicone is sensitive to what it touches. Wacker's processing guidelines for RTV silicones say inhibition shows as permanent surface tackiness, liquid rubber at the interface, or much slower curing. Its list of typical inhibitors includes sulfur compounds, amines and amine-containing substances such as polyurethanes and amine-cured epoxy resins, organotin compounds including tin-cure silicone, and many oils, waxes and release agents. Smooth-On's Mold Star bulletin adds latex, sulfur clays, certain wood surfaces, newly cast polyester, epoxy and urethane rubber, and warns that those silicones will not cure against sulfur even when the surface is sealed. Both makers give the same advice for an unknown surface: test first.
- Run a small test. Wacker strongly recommends preliminary trials when a surface's effect is unknown. Smooth-On's method is to apply a little rubber to a non-critical area and check it after the stated cure time; gummy or uncured rubber means inhibition.
- Cure resin prints fully. Smooth-On says platinum silicone works against most resin prints only once they are fully UV post-cured, and that recesses the light does not reach stay under-cured and inhibit the rubber there. A mold's cavity is exactly that kind of recess.
- Clean out uncured resin, including inside hollow prints. Smooth-On's printing-resin bulletin warns that uncured resin left in details, creases or hollow interiors inhibits platinum silicone.
- Seal the surface. Smooth-On reports that a clear acrylic lacquer is usually effective, and rates sealer and release combinations rubber by rubber in its chart for resin prints. Wacker lists amine-cured epoxies among inhibitors, so test the sealer with your silicone too.
- Consider tin-cure silicone where the job allows. Wacker describes condensation-cure (tin) silicone as almost insensitive to inhibition by other substances. Smooth-On notes it has a shorter library life and cannot be used with platinum-cure casting silicones.
Release Agents
A printed mold is not silicone, so it does not release on its own. Smooth-On's bulletin for its Smooth-Cast 300 series urethanes says a release agent is necessary when casting into or over most surfaces, applied to every surface that will touch the plastic, while its silicone molds usually need none unless silicone is cast into them. Its printing-resin bulletin requires a release agent before casting platinum silicone into a print. Choose the release agent with the inhibition list in mind, since Wacker counts many release agents among inhibitors, and include it in your test pour.
Venting and Pouring
Air has to leave the cavity as liquid enters it. Smooth-On's bulletins say to pour in a single spot at the lowest point and let the material find its own level, which helps minimize trapped air. In its venting tutorial, vents are punched over the highest points of the top mold half, and the mold is full when liquid shows at every vent. A printed mold can have its pour spout and vents modeled into the CAD, placed at the high points of the cavity in the orientation it will be poured.
Heat: Exotherm and Heat Curing
Some casting materials heat the mold. Smooth-On warns that its Smooth-Cast 300 series generates heat above 212°F (100°C) once parts A and B are combined, and its coating bulletin cautions that some 3D print media will melt at temperatures above 200°F. Platinum silicone can also be cured faster with mild heat: Smooth-On's example for Mold Star 16 is a hot box at 140°F (60°C). A printed mold that will see either needs heat resistance to spare. Ask about a heat-resistant resin such as High-Temperature Resin, and check the casting material's bulletin for its cure temperature and exotherm before choosing.
Printed Inserts for Short-Run Molding
Printed inserts for injection molds appear in research and pilot production, and the studies are as plain about their limits as about their benefits.
- A Technical University of Denmark study molded polyethylene parts from a printed photopolymer insert and a machined brass one. It found that printing can make pilot production significantly more cost effective in development time and investment, but that the photopolymer insert's lifetime was challenging to predict, insert production was less reliable than milling, and the parts' surface appearance differed. It suggests several printed inserts in place of one brass insert, and says printed inserts need their own tool design rules.
- A Politecnico di Milano study printed FDM inserts in a high-temperature PEI filament. Its simulations found the inserts unsuitable for mass production because of prolonged cooling times and elastic deformation. Two printed inserts made 20 parts without relevant damage, but the parts were hard to demold and cooling water permeated the inserts. It lists creep, limited mechanical properties, thermal degradation, reduced tool life, longer cooling time and rough surfaces as common problems of polymer tools.
- Treat a printed insert as a short-run experiment planned with your molder. We print parts; we do not run injection molding. For the wider print-or-mold decision, see 3D printing vs injection molding.
Investment Casting: The Pattern Burns Out
For metal parts, the print is neither master nor mold but a sacrificial pattern. NIST's review of additive manufacturing lists investment casting patterns among the uses of vat photopolymerization, which cures liquid resin in a vat with light, as SLA does. We print Castable Resin patterns for investment casting; the pattern is invested and burned out at your foundry, which casts the metal. We do not cast metal.
Master or Mold: A Decision Table
| If the part | Why | |
|---|---|---|
| Has undercuts or delicate features | A master | Flexible silicone releases them |
| Needs a fine cosmetic surface | An SLA master | The silicone copies the master's finish |
| Is a simple, drafted shape for a few castings | The mold | It skips the silicone step |
| Is soft silicone that can be pulled out | The mold, sealed and tested | Inhibition risk at the printed surface |
| Is cast in a hot or heat-cured material | A master, or a heat-resistant mold | Heat can soften some printed materials |
| Will need repeat runs | A master, kept | A worn mold is remade from it |
| Is metal | A castable resin pattern | The pattern burns out at the foundry |
Starting a Mold Project
Choose the Mold project type on the quote page and say whether you want a master, a mold or a casting pattern, what you will cast (material and cure type), how many castings you need, and which faces are cosmetic or critical. Mold projects are reviewed per project, and the team confirms what it can supply for yours. We print SLA master patterns for silicone molding and urethane casting, and castable resin for investment casting; silicone casting is reviewed per project. For resin choice, see engineering SLA resins, and for finishing a master, the post-processing guide.
Frequently asked questions
Should I 3D print the mold or a master?
Will platinum silicone cure in a 3D printed mold?
Do I need a release agent in a printed mold?
How many castings will a printed mold make?
Can you cast the parts for me?
Sources
- Smooth-On: Tips for Using Silicone Rubber to Make Molds of UV Resin 3D Prints
- Smooth-On: XTC-3D PRINT Technical Bulletin
- Smooth-On: XTC-3D Technical Bulletin
- Smooth-On: Mold Star 15, 16 and 30 Technical Bulletin
- Smooth-On: Smooth-Cast 300 Series Technical Bulletin
- Smooth-On: Types of RTV Mold Rubber
- Smooth-On: Durometer Shore Hardness Scale
- Smooth-On: How to Vent a Silicone Mold to Eliminate Bubbles in Casting
- Wacker: Room Temperature Vulcanizing (RTV) Silicones, Material and Processing Guidelines
- Wacker: Reproduction molding with ELASTOSIL silicone rubber
- MIT OpenCourseWare: 2.008 Design and Manufacturing II, Lecture 3, Injection Molding II (Spring 2025)
- Technical University of Denmark: Mischkot et al., Injection Moulding Pilot Production, Tool Inserts Made from Brass and a 3D Printed Photopolymer (ANTEC 2017)
- Politecnico di Milano: Farioli et al., Rapid tooling for injection molding inserts (ESAFORM 2021)
- NIST: Costs and Cost Effectiveness of Additive Manufacturing (Special Publication 1176)
Describe your mold project
Start a Mold project on the quote page: say whether you need a master, a mold or a casting pattern, and what you will cast. The team reviews it and confirms what it can supply.
Start a mold project