Custom Silicone Parts in Small Quantities: Mold Costs, Samples, and Repeat Orders
How small runs of custom silicone parts are made from a printed master and a mold, what drives tooling cost, how to approve samples and plan repeat runs.
The Short Answer
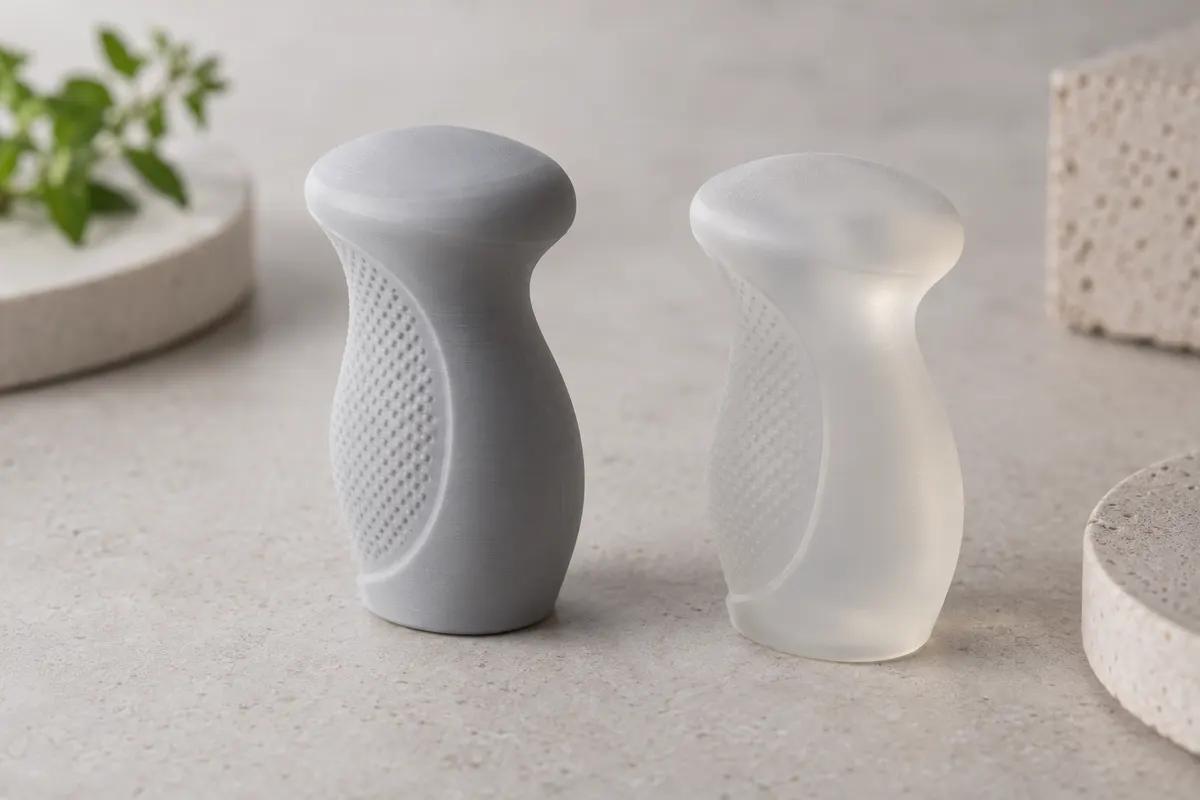
Small batches of custom silicone parts are usually cast, not printed. A master pattern of the part is made, a mold is poured around it, and liquid silicone is cast into the mold, cured, demolded and trimmed. The mold is the tooling: it carries most of the setup cost, decides which shapes are possible, and wears with use, so repeat orders depend on keeping the master. We print SLA master patterns for silicone molding and urethane casting. Mold and silicone casting projects are reviewed per project, and the team confirms what it can supply for yours.
How Mold-and-Cast Production Works
Room-temperature silicone molding follows the same sequence whatever the part. The steps below follow Smooth-On's technical bulletins and mold-making tutorials:
- Master pattern. A positive of the finished part. Silicone mold rubber reproduces the original faithfully (Wacker), so every casting copies the master, surface texture included, and the master's accuracy and finish set the ceiling for the parts.
- Mold making. The master is fixed in a mold box. For a two-part mold, a parting line is chosen and marked on the master, the first half is poured against a clay bed fitted with registration keys, and a release agent goes on the cured half before the second half is poured. A clay plug forms the pour spout.
- Pouring the mold. Mold rubber is mixed, optionally vacuum degassed to remove trapped air, and poured in one spot at the lowest point so it levels itself. Smooth-On's Mold Star bulletin calls for at least 1/2 in (1.3 cm) of rubber over the highest point of the model.
- Curing and opening the mold. The rubber cures at room temperature, the mold is opened, and the master comes out.
- Casting. Silicone for the part is mixed and poured into the mold. Silicone bonds to silicone, so a silicone mold needs a release agent made for silicone-on-silicone work; one with a significant amount of silicone oil will not do.
- Curing, demolding and trimming. Each casting cures and comes out, then the flash at the parting line and the pour spout is trimmed before inspection.
Cast, Printed or Injection Molded
Silicone and silicone-like parts reach a buyer by several routes, and they are not interchangeable:
| Route | How it works | Where it fits |
|---|---|---|
| Mold and cast | Printed master, silicone mold, cast parts | Small batches in real silicone |
| Direct silicone printing | Liquid silicone deposited, then cured | Specialized; not a process we run |
| Printed elastomer | TPU or flexible resin printed directly | Fit and feel checks before tooling |
| Liquid injection molding | Two-part LSR heat-cured in an injection mold | High-speed production |
Where Printing Fits
Silicone can be printed directly, by depositing liquid silicone and curing it (Yamagishi et al., MRS Communications), but that is a specialized process, separate from FDM and SLA. What we print for silicone work is the master. When you need a flexible part in hand before paying for a mold, a printed elastomer can stand in: TPU 85A or TPU 64D on FDM, or flexible and rubber-like resins on SLA (TPU and flexible printing). They are not silicone, so they check shape, fit and assembly, not the silicone part's own properties. At the other end of the scale, liquid silicone rubber is processed by liquid injection molding, which Dow describes as a two-part material heat-cured rapidly for high-speed processing (Dow). That route needs its own injection tooling, a different investment from a poured mold.
Preparing an SLA Master
We print masters in SLA. On our SLA parts the support marks on the bottom face are sanded by default, and polishing and painting are available as add-ons, so the master can be finished to the surface you want on the part. One chemistry issue needs planning. Platinum-cure silicone can fail to cure against a resin print that is not fully post-cured, staying tacky where it touched the model. Smooth-On's guidance for molding UV-resin prints:
- Wash the print in isopropyl alcohol, then in soap and water, and let it dry fully.
- Post-cure it thoroughly under UV light, turning it so the light reaches every surface, including deep recesses.
- Prefer clear or translucent resin, which lets the light cure the print through; Smooth-On advises against opaque resin for prints meant to be molded.
- Seal the surface with a clear coating, let it dry completely, then apply a release agent suited to the rubber.
- Pour a small test on a non-critical area first. Rubber that is still gummy after its cure time means inhibition.
- Tin-cure silicone is much less prone to inhibition by UV resin, but it has a shorter library life and cannot be used with platinum-cure casting silicones.
- Say a print is a mold master when you start the project, because it affects resin and finish. Metal parts made by investment casting take a different route, from castable resin patterns.
Dimensions and Shrinkage
A cast part is not automatically the size of its master. Mold rubber and casting materials can each change dimension slightly as they cure. Platinum mold rubbers are low-shrink (Smooth-On's technical bulletin lists linear shrinkage below 0.001 in./in. for Mold Star 15, 16 and 30), while tin-cure molds tend to shrink more over time. If the casting silicone's datasheet lists shrinkage and a dimension is critical, the master can be scaled to compensate. The printed master itself follows the published SLA guidance of ±0.1 mm, which is geometry-dependent and not a guarantee, and the casting's own tolerance depends on the mold and material as well (tolerances and accuracy).
Choosing Hardness: Shore A
Silicone hardness is quoted on durometer scales. Shore 00 covers very soft rubbers and gels, Shore A covers flexible rubbers, and Shore D covers hard rubbers and plastics. The scales overlap (Smooth-On gives 95A as also 45D), and within a scale a lower number is softer (Smooth-On durometer scale). Technical bulletins report hardness against a test standard; Smooth-On's, for example, give Shore A measured to ASTM D2240. Choose by function:
- Seals and gaskets: a softer compound conforms to the mating surface with less closing force.
- Grips, bumpers and feet: soft enough to give under the hand or load, firm enough to keep their shape.
- Plugs, keys and parts that locate other parts: firmer, so they deform less under the same load.
- Thin or detailed features: a softer silicone flexes more when the part is pulled from the mold, but check the tear strength on the material's bulletin, because thin edges are where a tear starts.
- Judge hardness on fully cured samples. Makers measure it after full cure under stated conditions; Smooth-On's Mold Star bulletin, for example, reports values measured after 7 days at 73°F (23°C).
- Write the target hardness and an acceptable range on the drawing, so samples can be accepted or rejected against something.
Designing a Part for a Mold
- Parting line. Where mold halves meet, the part carries a witness line and possibly flash. Put it on an edge, away from sealing faces and cosmetic surfaces, and mark on the drawing where it may go.
- Undercuts. A flexible mold can stretch around moderate undercuts, which is why softer mold rubbers suit intricate originals. A deep enclosed cavity can lock the mold to the master and may need an extra mold piece or a core.
- Draft. Flexible molds are forgiving, but a slight taper on deep pockets and tall ribs still makes demolding easier, and helps more if the mold is rigid.
- Wall thickness. Very thin walls and fine fins are the features most likely to tear when the part is pulled out. Keep sections reasonably even, and add fillets where thin features meet the body.
- Air traps. Pockets that face up in the mold can trap air. Vent placement, pouring at the lowest point and vacuum degassing all reduce voids.
Samples and Approval
Because every casting copies the master, approval works in two stages:
- Approve the master before the mold is poured: dimensions, surface finish, and any text or texture. A change after that means a new master and a new mold.
- Approve first castings against a drawing that names the critical features: sealing faces, mating dimensions, hardness and color.
- Inspect castings for voids, flash at the parting line, tears at thin features, and full cure.
- Keep an approved sample as the reference for repeat runs.
Repeat Orders and Mold Life
A silicone mold is not permanent. Smooth-On's bulletin says a mold's physical life depends on how it is used (the materials cast and how often) and that abrasive casting materials can quickly erode mold detail. Storage life varies by chemistry as well: Smooth-On puts the library life of some tin-cure molds as short as 12 months, and platinum-cure molds in decades. Plan repeat production around that:
- Keep the master and the CAD. A worn mold is remade from the master; without it, the next run starts over.
- Record the specification: silicone grade, hardness, color, release agent and cure conditions, so a later batch matches the first.
- Store molds clean, dry, assembled and flat in a cool place, as the maker recommends.
- For larger or recurring batches, more than one mold can be made from the same master, which also spreads the wear.
What Drives the Cost
There is no universal price for a silicone part, because the setup dominates a small batch and setup depends on the part. The main drivers, roughly in the order they appear (for how small runs compare across processes, see small-batch production):
- The master: its size, detail and surface finish.
- The mold: the volume of rubber (the part plus a wall around it), the number of mold pieces, the parting line, and features such as undercuts and cores.
- The casting silicone: grade, hardness, color and the amount each part uses.
- Cycle time: each mold yields one casting per cure, so a slow-curing compound or a larger batch may call for extra molds.
- Per-part handling: release, demolding, trimming and inspection.
- Revisions: a design change after the mold is made needs a new master and a new mold.
- Mold replacement on longer or repeated runs, as molds wear.
Medical, Food and Skin-Contact Uses
This guide does not cover parts for medical, food or skin-contact applications, and we make no claim that any part we supply suits them. A silicone's ratings come from its maker's testing of that material and do not transfer to a finished part automatically.
Starting a Silicone Project
Choose the Mold project type on the quote page and describe the part: what it does, its size, how many you need now and later, target hardness, color, and which faces are critical. Attach a CAD model if you have one. If you only have a physical sample or a sketch, 3D scanning or 3D modeling services can produce the CAD for the master; modeling is quoted per project with a fixed price and schedule before work starts. For help choosing the master's resin, see how to choose an SLA resin. Mold projects are reviewed per project, and the team confirms what it can supply for that project.
Frequently asked questions
Can you 3D print silicone parts directly?
How many parts can one silicone mold make?
What Shore A hardness should I specify?
Can I test a flexible part before paying for a mold?
Why did silicone stay sticky against a resin print?
Sources
- Smooth-On: Mold Star 15, 16 and 30 Technical Bulletin
- Smooth-On: Tips for Using Silicone Rubber to Make Molds of UV Resin 3D Prints
- Smooth-On: My silicone rubber mold did not cure against my SLA 3D printed model
- Smooth-On: Differences between tin-cure and platinum-cure silicone mold rubbers
- Smooth-On: How do I release silicone from silicone?
- Smooth-On: Durometer Shore Hardness Scale
- Smooth-On: How to Cast a Crystal Clear Shell in a Mold Star 15 Mold (two-part mold tutorial)
- Wacker: Reproduction molding with ELASTOSIL silicone rubber
- Dow: Liquid Silicone Rubber (LSR)
- MRS Communications (Yamagishi et al., 2024): Direct ink writing of silicone elastomers
Describe your silicone part
Start a Mold project on the quote page with the part's size, quantity, hardness and critical faces. The team reviews it and confirms what it can supply.
Start a mold project